
|
Jupyter at Bryn Mawr College |
|
|
| Public notebooks: /services/public/dblank | |||
Jupyter Notebook Users Manual
This page describes the functionality of the Jupyter electronic document system. Jupyter documents are called "notebooks" and can be seen as many things at once. For example, notebooks allow:
- creation in a standard web browser
- direct sharing
- using text with styles (such as italics and titles) to be explicitly marked using a wikitext language
- easy creation and display of beautiful equations
- creation and execution of interactive embedded computer programs
- easy creation and display of interactive visualizations
Jupyter notebooks (previously called "IPython notebooks") are thus interesting and useful to different groups of people:
- readers who want to view and execute computer programs
- authors who want to create executable documents or documents with visualizations
Table of Contents
- 1. Getting to Know your Jupyter Notebook's Toolbar
- 2. Different Kinds of Cells
- 3. Keyboard Shortcuts
- 4. Using Markdown Cells for Writing
- 4.1 Block Elements
- 4.2 Backslash Escape
- 4.3 Hyperlinks
- 4.4 Tables
- 4.5 Style and Emphasis
- 4.6 Other Characters
- 4.7 Including Code Examples
- 4.8 Images
- 4.9 LaTeX Math
- 5. Bibliographic Support
- 6. Turning Your Jupyter Notebook into a Slideshow
1. Getting to Know your Jupyter Notebook's Toolbar
At the top of your Jupyter Notebook window there is a toolbar. It looks like this:

Below is a table which helpfully pairs a picture of each of the items in your toolbar with a corresponding explanation of its function.
| Button | Function |
|---|---|
 |
This is your save button. You can click this button to save your notebook at any time, though keep in mind that Jupyter Notebooks automatically save your progress very frequently. |
 |
This is the new cell button. You can click this button any time you want a new cell in your Jupyter Notebook. |
 |
This is the cut cell button. If you click this button, the cell you currently have selected will be deleted from your Notebook. |
 |
This is the copy cell button. If you click this button, the currently selected cell will be duplicated and stored in your clipboard. |
 |
This is the past button. It allows you to paste the duplicated cell from your clipboard into your notebook. |
 |
These buttons allow you to move the location of a selected cell within a Notebook. Simply select the cell you wish to move and click either the up or down button until the cell is in the location you want it to be. |
 |
This button will "run" your cell, meaning that it will interpret your input and render the output in a way that depends on what kind of cell you're using. |
 |
This is the stop button. Clicking this button will stop your cell from continuing to run. This tool can be useful if you are trying to execute more complicated code, which can sometimes take a while, and you want to edit the cell before waiting for it to finish rendering. |
 |
This is the restart kernel button. See your kernel documentation for more information. |
 |
This is a drop down menu which allows you to tell your Notebook how you want it to interpret any given cell. You can read more about the different kinds of cells in the following section. |
 |
Individual cells can have their own toolbars. This is a drop down menu from which you can select the type of toolbar that you'd like to use with the cells in your Notebook. Some of the options in the cell toolbar menu will only work in certain kinds of cells. "None," which is how you specify that you do not want any cell toolbars, is the default setting. If you select "Edit Metadata," a toolbar that allows you to edit data about Code Cells directly will appear in the corner of all the Code cells in your notebook. If you select "Raw Cell Format," a tool bar that gives you several formatting options will appear in the corner of all your Raw Cells. If you want to view and present your notebook as a slideshow, you can select "Slideshow" and a toolbar that enables you to organize your cells in to slides, sub-slides, and slide fragments will appear in the corner of every cell. Go to this section for more information on how to create a slideshow out of your Jupyter Notebook. |
 |
These buttons allow you to move the location of an entire section within a Notebook. Simply select the Header Cell for the section or subsection you wish to move and click either the up or down button until the section is in the location you want it to be. If your have used Automatic Section Numbering or Table of Contents Support remember to rerun those tools so that your section numbers or table of contents reflects your Notebook's new organization. |
 |
Clicking this button will automatically number your Notebook's sections. For more information, check out the Reference Guide's section on Automatic Section Numbering. |
 |
Clicking this button will generate a table of contents using the titles you've given your Notebook's sections. For more information, check out the Reference Guide's section on Table of Contents Support. |
 |
Clicking this button will search your document for cite commands and automatically generate intext citations as well as a references cell at the end of your Notebook. For more information, you can read the Reference Guide's section on Bibliographic Support. |
 |
Clicking this button will toggle cell tabbing, which you can learn more about in the Reference Guides' section on the layout options for Code Cells. |
 |
Clicking this button will toggle the collumn configuration for Code Cells, which you can learn more about in the Reference Guides' section on the layout options for Code Cells. |
 |
Clicking this button will toggle spell checking. Spell checking only works in unrendered Markdown Cells and Header Cells. When spell checking is on all incorrectly spelled words will be underlined with a red squiggle. Keep in mind that the dictionary cannot tell what are Markdown commands and what aren't, so it will occasionally underline a correctly spelled word surrounded by asterisks, brackets, or other symbols that have specific meaning in Markdown. |
2. Different Kinds of Cells
There are essentially four kinds of cells in your Jupyter notebook: Code Cells, Markdown Cells, Raw Cells, and Header Cells, though there are six levels of Header Cells.
2.1 Code Cells
By default, Jupyter Notebooks' Code Cells will execute Python. Jupyter Notebooks generally also support JavaScript, Python, HTML, and Bash commands. For a more comprehensive list, see your Kernel's documentation.
2.1.1 Code Cell Layout
Code cells have both an input and an output component. You can view these components in three different ways.
2.1.1.1 Row Configuration (Default Setting)
Unless you specific otherwise, your Code Cells will always be configured this way, with both the input and output components appearing as horizontal rows and with the input above the output. Below is an example of a Code Cell in this default setting:
2 + 3
2.1.1.2 Cell Tabbing
Cell tabbing allows you to look at the input and output components of a cell separately. It also allows you to hide either component behind the other, which can be usefull when creating visualizations of data. Below is an example of a tabbed Code Cell:
2.1.1.3 Column Configuration
Like the row configuration, the column layout option allows you to look at both the input and the output components at once. In the column layout, however, the two components appear beside one another, with the input on the left and the output on the right. Below is an example of a Code Cell in the column configuration:
2+3
2.2 Markdown Cells
In Jupyter Notebooks, Markdown Cells are the easiest way to write and format text. For a more thorough explanation of how to write in Markdown cells, refer to this section of the guide.
2.3 Raw Cells
Raw Cells, unlike all other Jupyter Notebook cells, have no input-output distinction. This means that Raw Cells cannot be rendered into anything other than what they already are. If you click the run button in your tool bar with a Raw Cell selected, the cell will remain exactly as is and your Jupyter Notebook will automatically select the cell directly below it. Raw cells have no style options, just the same monospace font that you use in all other unrendered Notebook cells. You cannot bold, italicize, or enlarge any text or characters in a Raw Cell.
Because they have no rendered form, Raw Cells are mainly used to create examples. If you save and close your Notebook and then reopen it, all of the Code, Markdown, and Header Cells will automatically render in whatever form you left them when you first closed the document. This means that if you wanted to preserve the unrendered version of a cell, say if you were writing a computer science paper and needed code examples, or if you were writing documentation on how to use Markdown and needed to demonstrate what input would yield which output, then you might want to use a Raw Cell to make sure your examples stayed in their most useful form.
2.4 Header Cells
While it is possible to organize your document using Markdown headers, Header Cells provide a more deeply structural organization for your Notebook and thus there are several advantages to using them.
2.4.1 Linking
Header Cells have specific locations inside your Notebook. This means you can use them to create Notebook-internal links.
2.4.2 Automatic Section Numbering and Table of Contents Support
Your Jupyter Notebook has two helpful tools that utilize the structural organization that Header Cells give your document: automatic section numbering and table of contents generation.
2.4.2.1 Automatic Section Numbering
Suppose you are writing a paper and, as is prone to happening when you have a lot of complicate thoughts buzzing around your brain, you've reorganized your ideas several times. Automatic section numbering will go through your Notebook and number your sections and subsection as designated by your Header Cells. This means that if you've moved one or more big sections around several times, you won't have to go through your paper and renumber it, as well as all its subsections, yourself.
Notes: Automatic Section Numbering tri-toggling tool, so when you click the Number Sections button one of three actions will occur: Automatic Section Numbering will number your sections, correct inconsistent numbering, or unnumber your sections (if all of your sections are already consistently and correctly numbered).
So, even if you have previously numbered your sections, Automatic Section Numbering will go through your document, delete the current section numbers, and replace them the correct number in a linear sequence. This means that if your third section was once your second, Automatic Section Numbering will delete the "2" in front of your section's name and replace it with a "3."
While this function saves you a lot of time, it creates one limitation. Maybe you're writing a paper about children's books and one of the books you're discussing is called 2 Cats. You've unsurprisingly titled the section where you summarize and analyze this book 2 Cats. Automatic Section Numbering will assume the number 2 is section information and delete it, leaving just the title Cats behind. If you bold, italicize, or place the title of the section inside quotes, however, the entire section title will be be preserved without any trouble. It should also be noted that even if you must title a section with a number occurring before any letters and you do not want to bold it, italicize it, or place it inside quotes, then you can always run Automatic Section Numbering and then go to that section and retype its name by hand.
Because Automatic Section Numbering uses your header cells, its performance relies somewhat on the clarity of your organization. If you have two sections that begin with Header 1 Cells in your paper, and each of the sections has two subsections that begin with Header 2 Cells, Automatic Section Numbering will number them 1, 1.1, 1.2, 2, 2.1, and 2.2 respectively. If, however, you have used a Header 3 Cell to indicate the beginning of what would have been section 2.1, Automatic Section Numbering will number that section 2.0.1 and an error message will appear telling you that "You placed a Header 3 cell under a Header 2 Cell in section 2". Similarly, if you begin your paper with any Header Cell smaller than a Header 1, say a Header 3 Cell, then Automatic Section Numbering will number your first section 0.0.3 and an error message will appear telling you that "Notebook begins with a Header 3 Cell."
2.4.2.2 Table of Contents Support
The Table of Contents tool will automatically generate a table of contents for your paper by taking all your Header Cell titles and ordering them in a list, which it will place in a new cell at the very beginning of you Notebook. Because your Notebook does note utilize formal page breaks or numbers, each listed section will be hyperlinked to the actual section within your document.
Notes: Because Table of Contents Support uses your header cells, its performance relies somewhat on the clarity of your organization. If you have two sections that begin with Header 1 Cells in your paper, and each of the sections has two subsections that begin with Header 2 Cells, Table of Contents will order them in the following way:
- 1.
- 1.1
- 1.2
- 2.
- 2.1
- 2.2
If, however, you have used a Header 3 Cell to indicate the beginning of what would have been section 2.1, Table of Contents Support will insert a dummy line so that your table of contents looks like this:
- 1.
- 1.1
- 1.2
- 2.
-
- 2.0.1
- 2.2
-
2.4.2.3 Using Both Automatic Section Numbering and Table of Contents Support
Automatic Section Numbering will always update every aspect of your notebook that is dependent on the title of one or more of your sections. This means that it will automatically correct an existing table of contents and all of your Notebook-internal links to reflect the new numbered section titles.
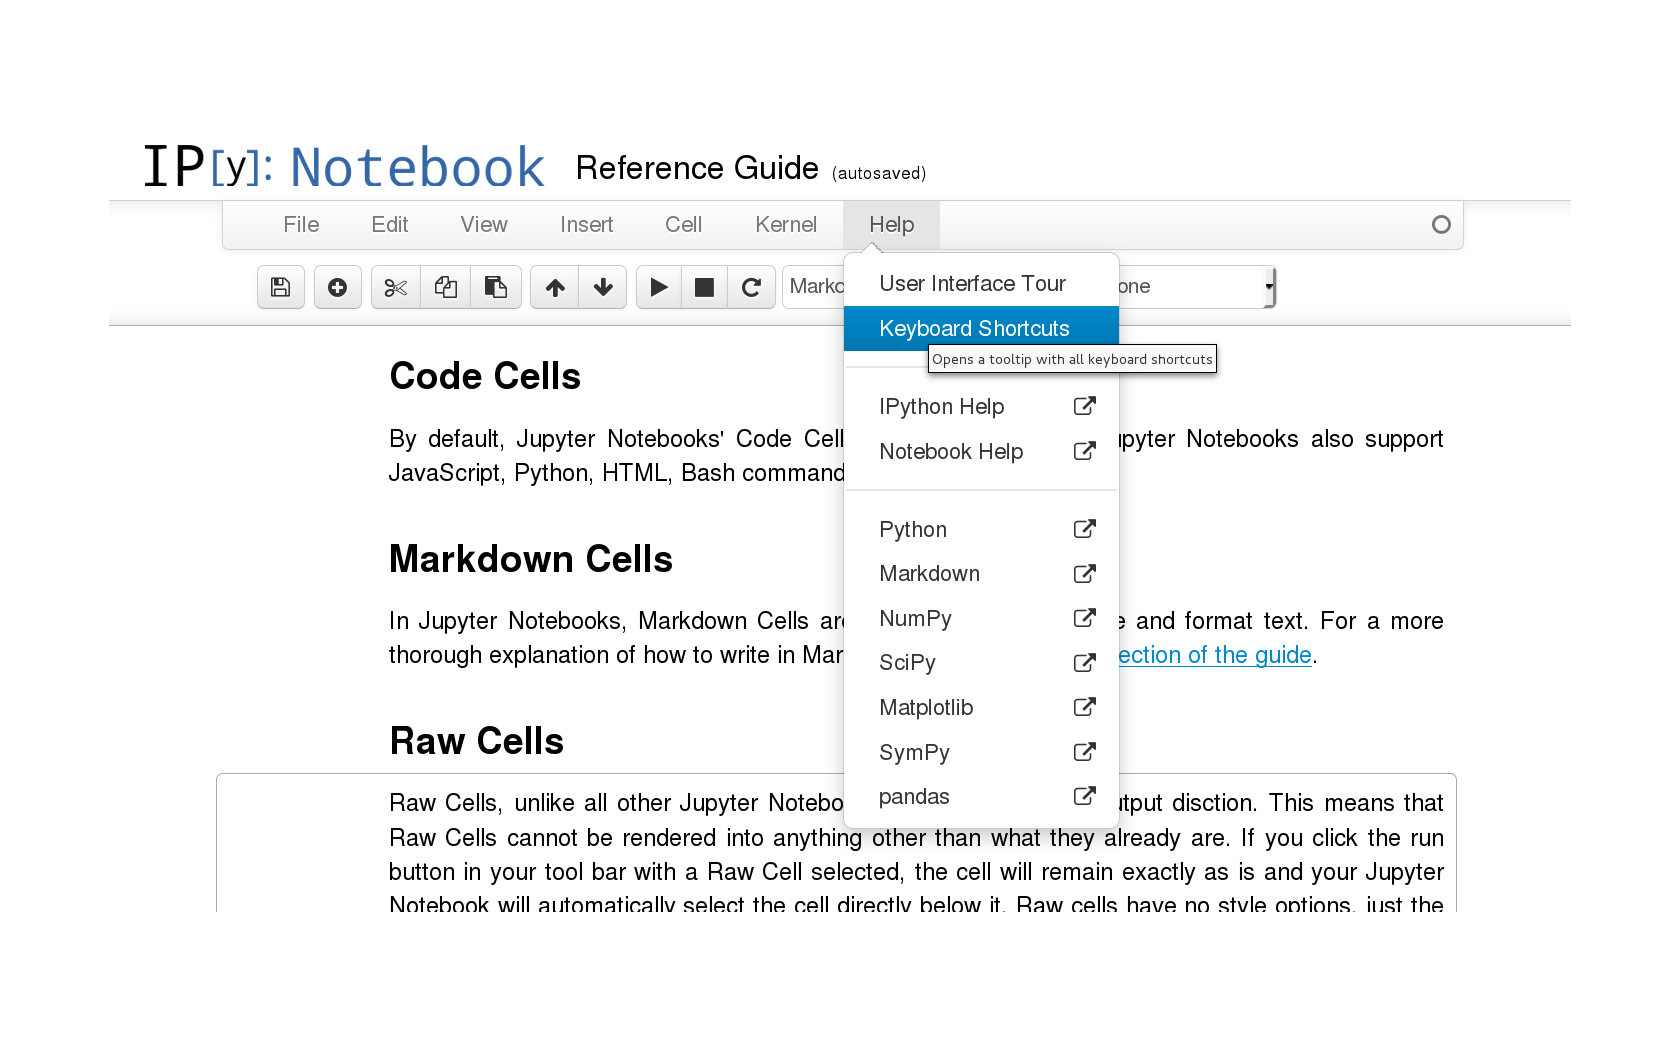
3. Keyboard Shortcuts
Jupyter Notebooks support many helpful Keyboard shortcuts, including ones for most of the buttons in your toolbar. To view these shortcuts, you can click the help menu and then select Keyboard Shortcuts, as pictured below.
4. Using Markdown Cells for Writing
Why aren't there font and font size selection drop down menus, buttons I can press to bold and italicize my text, or other advanced style options in my Notebook?
When you use Microsoft Word, Google Docs, Apple Pages, Open Office, or any other word processing software, you generally use your mouse to select various style options, like line spacing, font size, font color, paragraph format etc. This kind of system is often describes as a WYSIWYG (What You See Is What You Get) interface. This means that the input (what you tell the computer) exactly matches the output (what the computer gives back to you). If you type the letter G, highlight it, select the color green and up the font size to 64 pt, your word processor will show you a fairly large green colored letter G. And if you print out that document you will print out a fairly large green colored letter G.
This Notebook, however, does not use a WYSIWYG interface. Instead it uses something called a "markup Language". When you use a a markup language, your input does not necessarily exactly equal your output.
For example, if I type "#Header 1" at the beginning of a cell, but then press Shift-Enter (or click the play button at the top of the window), this notebook will turn my input into a somewhat different output in the following way:
#Header 1
Header 1
And if I type "##Header 2" (at the beginning of a cell), this notebook will turn that input into another output:
##Header 2
Header 2
In these examples, the hashtags are markers which tell the Notebook how to typeset the text. There are many markup languages, but one family, or perhaps guiding philosophy, of markup languages is called "Markdown," named somewhat jokingly for its simplicity. Your Notebook uses "marked," a Markdown library of typeset and other formatting instructions, like the hashtags in the examples above.
Markdown is a markup language that generates HTML, which the cell can interpret and render. This means that Markdown Cells can also render plain HTML code. If you're interested in learning HTML, check out this helpful online tutorial.
Why Use Markdown (and not a WYSIWYG)?
Why is Markdown better? Well, it’s worth saying that maybe it isn't. Mainly, it’s not actually a question of better or worse, but of what’s in front of you and of who you are. A definitive answer depends on the user and on that user’s goals and experience. These Notebooks don't use Markdown because it's definitely better, but rather because it's different and thus encourages users to think about their work differently.
It is very important for computer science students to learn how to conceptualize input and output as dependent, but also distinct. One good reason to use Markdown is that it encourages this kind of thinking. Relatedly, it might also promote focus on substance over surface aesthetic. Markdown is somewhat limited in its style options, which means that there are inherently fewer non-subject-specific concerns to agonize over while working. It is the conceit of this philosophy that you would, by using Markdown and this Notebook, begin to think of the specific stylistic rendering of your cells as distinct from what you type into those same cells, and thus also think of the content of your writing as necessarily separate from its formating and appearance.
4.1 Block Elements
4.1.1 Paragraph Breaks
Paragraphs consist of one or more consecutive lines of text and they are separated by one or more blank lines. If a line contains only spaces, it is a blank line.
4.1.2 Line Breaks
4.1.2.1 Hard-Wrapping and Soft-Wrapping
If you're used to word processing software, you've been writing with automatically hard-wrapped lines and paragraphs. In a hard-wrapped paragraph the line breaks are not dependent on the size of the viewing window. If you click and drag your mouse to expand a word processing document, for example, the shape of the paragraphs and the length of the lines will not change. In other words, the length of a hard-wrapped line is determined either by the number of words in the line (in the case of word processing software where this number is predetermined and the program wraps for the user automatically), or individual intention (when a user manually presses an Enter or Return key to control exactly how long a line is).
Soft-wrapped paragraphs and lines, however, do depend on the size of their viewing window. If you increase the size of a window where soft-wrapped paragraphs are displayed, they too will expand into longer lines, becoming shorter and wider to fill the increased window space horizontally. Unsurprising, then, if you narrow a window, soft-wrapped lines will shrink and the paragraphs will become longer vertically.
Markdown, unlike most word processing software, does not automatically hard-wrap. If you want your paragraphs to have a particular or deliberate shape and size, you must insert your own break by ending the line with two spaces and then typing Return.
4.1.2.2 Soft-Wrapping
blah blah blah blah blah blah blah blah blah blah blah blah blah blah blah blah blah blah blah blah blah blah blah blah blah blah blah blah blah blah blah blah blah blah blah blah blah blah blah blah blah blah blah blah blah
4.1.2.3 Hard-Wrapping
blah blah blah blah blah
blah blah blah blah blah blah blah blah blah
blah blah blah blah blah blah blah blah blah blah blah
blah blah blah blah blah
blah blah blah blah blah
blah blah blah blah blah blah blah blah blah blah blah blah blah
4.1.3 Headers
#Header 1
Header 1
##Header 2
Header 2
###Header 3
Header 3
####Header 4
Header 4
#####Header 5
Header 5
######Header 6
Header 6
4.1.4 Block Quotes
4.1.4.1 Standard Block Quoting
blah blah block quote blah blah block quote blah blah block
quote blah blah block quote blah blah block
quote blah blah block quote blah blah block quote blah blah block quote
Note: Block quotes work best if you intentionally hard-wrap the lines.
4.1.4.2 Nested Block Quoting
>blah blah block quote blah blah block quote blah blah block
block quote blah blah block block quote blah blah block
>>quote blah blah block quote blah blah
block block quote blah blah block
>>>quote blah blah block quote blah blah block quote blah blah block quote
blah blah block quote blah blah block quote blah blah block
block quote blah blah block block quote blah blah blockquote blah blah block quote blah blah
block block quote blah blah blockquote blah blah block quote blah blah block quote blah blah block quote
4.1.5 Lists
4.1.5.1 Ordered Lists
In Markdown, you can list items using numbers, a +, a -, or a *. However, if the first item in a list or sublist is numbered, Markdown will interpret the entire list as ordered and will automatically number the items linearly, no matter what character you use to denote any given separate item.
####Groceries:

0. Fruit:
    6. Pears
    0. Peaches
    3. Plums
    4. Apples
        2. Granny Smith
        7. Gala
    * Oranges
    - Berries
        8. Strawberries
        + Blueberries
        * Raspberries
    - Bananas
9. Bread:
    9. Whole Wheat
        0. With oats on crust
        0. Without oats on crust
    0. Rye
    0. White
0. Dairy:
    0. Milk
        0. Whole
        0. Skim
    0. Cheese
        0. Wisconsin Cheddar
        0. Pepper Jack
Groceries:
- Fruit:
- Pears
- Peaches
- Plums
- Apples
- Granny Smith
- Gala
- Oranges
- Berries
- Strawberries
- Blueberries
- Raspberries
- Bananas
- Bread:
- Whole Wheat
- With oats on crust
- Without oats on crust
- Rye
- White
- Whole Wheat
- Dairy:
- Milk
- Whole
- Skim
- Cheese
- Wisconsin Cheddar
- Pepper Jack
- Milk
4.1.5.2 Bulleted Lists
If you begin your list or sublist with a +, a -, or a *, then Markdown will interpret the whole list as unordered and will use bullets regardless of the characters you type before any individual list item.
####Groceries:

* Fruit:
    * Pears
    0. Peaches
    3. Plums
    4. Apples
        - Granny Smith
        7. Gala
    * Oranges
    - Berries
        - Strawberries
        + Blueberries
        * Raspberries
    - Bananas
9. Bread:
    * Whole Wheat
        * With oats on crust
        0. Without oats on crust
    + Rye
    0. White
0. Dairy:
    * Milk
        + Whole
        0. Skim
    - Cheese
        - Wisconsin Cheddar
        0. Pepper Jack
Groceries:
- Fruit:
- Pears
- Peaches
- Plums
- Apples
- Granny Smith
- Gala
- Oranges
- Berries
- Strawberries
- Blueberries
- Raspberries
- Bananas
- Bread:
- Whole Wheat
- With oats on crust
- Without oats on crust
- Rye
- White
- Whole Wheat
- Dairy:
- Milk
- Whole
- Skim
- Cheese
- Wisconsin Cheddar
- Pepper Jack
- Milk
4.1.6 Section Breaks
___
***
------
* * *
_ _ _
- - -
4.2 Backslash Escape
What happens if you want to include a literal character, like a #, that usually has a specific function in Markdown? Backslash Escape is a function that prevents Markdown from interpreting a character as an instruction, rather than as the character itself. It works like this:
\# Wow, this isn't a header.
# This is definitely a header.
# Wow, this isn't a header.
This is definitely a header.
Markdown allows you to use a backslash to escape from the functions of the following characters:
- \ backslash
- ` backtick
- * asterisk
- _ underscore
- {} curly braces
- [] square brackets
- () parentheses
- # hashtag
- + plus sign|
- - minus sign (hyphen)
- . dot
- ! exclamation mark
4.3 Hyperlinks
4.3.1 Automatic Links
http://en.wikipedia.org
4.3.2 Standard Links
[click this link](http://en.wikipedia.org)
4.3.3 Standard Links With Mouse-Over Titles
[click this link](http://en.wikipedia.org "Wikipedia")
4.3.4 Reference Links
Suppose you are writing a document in which you intend to include many links. The format above is a little arduous and if you have to do it repeatedly while you're trying to focus on the content of what you're writing, it's going to be a really big pain.
Fortunately, there is an alternative way to insert hyperlinks into your text, one where you indicate that there is a link, name that link, and then use the name to provide the actually URL later on when you're less in the writing zone. This method can be thought of as a "reference-style" link because it is similar to using in-text citations and then defining those citations later in a more detailed reference section or bibliography.
This is [a reference] [identification tag for link]

[identification tag for link]: http://en.wikipedia.org/wiki/Chile "Wikipedia Article About Chile"
This is a reference
Note: The "identification tag for link" can be anything. For example:
This is [a reference] [lfskdhflhslgfh333676]

[lfskdhflhslgfh333676]: http://en.wikipedia.org/wiki/Chile "Wikipedia Article About Chile"
This is a reference
This means you can give your link an intuitive, easy to remember, and relevant ID:
This is [a reference][Chile]

[chile]: http://en.wikipedia.org/wiki/Chile "Wikipedia Article About Chile"
This is a reference
Note: Link IDs are not case-sensitive.
If you don't want to give your link an ID, you don't have to. As a short cut, Markdown will understand if you just use the words in the first set of brackets to define the link later on. This works in the following way:
This is [a reference][]

[a reference]: http://en.wikipedia.org/wiki/Chile "Wikipedia Article About Chile"
This is a reference
Another really helpful feature of a reference-style link is that you can define the link anywhere in the cell. (must be in the cell) For example:
[ref]: http://en.wikipedia.org/wiki/Chile "Wikipedia Article About Chile"
This is a reference blah blah blah blah blah blah blah blah blah blah blah blah blah blah blah blah blah blah blah blah blah blah blah blah blah blah blah blah blah blah blah blah blah blah blah blah blah blah blah blah blah blah blah blah blah blah blah blah blah blah blah blah blah blah blah blah blah blah blah blah blah blah blah blah blah blah blah blah blah blah blah blah blah blah blah blah blah blah blah blah blah blah blah blah blah blah blah blah blah blah blah blah blah blah blah blah blah blah blah blah blah blah blah blah blah blah blah blah blah blah blah blah blah blah blah blah blah blah blah blah blah blah blah blah blah blah blah blah blah blah blah blah blah blah blah blah blah blah blah blah blah blah blah blah blah blah blah blah blah blah blah blah blah blah blah blah blah blah blah blah blah blah blah blah blah blah blah blah
Note: Providing a mouse-over title for any link, regardless of whether it is a standard or reference-stlye type, is optional. With reference-style links, you can include the mouse-over title by placing it in quotes, single quotes, or parentheses. For standard links, you can only define a mouse-over title in quotes.
4.3.5 Notebook-Internal Links
When you create a Header you also create a discrete location within your Notebook. This means that, just like you can link to a specific location on the web, you can also link to a Header Cell inside your Notebook. Internal links have very similar Markdown formatting to regular links. The only difference is that the name of the link, which is the URL in the case of external links, is just a hashtag plus the name of the Header Cell you are linking to (case-sensitive) with dashes in between every word. If you hover your mouse over a Header Cell, a blue Greek pi letter will appear next to your title. If you click on it, the URL at the top of your window will change and the internal link to that section will appear last in the address. You can copy and paste it in order to make an internal link inside a Markdown Cell.
4.3.5.1 Standard Notebook-Internal Links Without Mouse-Over Titles
[Here's a link to the section of Automatic Section Numbering](#Automatic-Section-Numbering)
4.3.5.2 Standard Notebook-Internal Links With Mouse-Over Titles
[Here's a link to the section on lists](#Lists "Lists")
4.3.5.3 Reference-Style Notebook-Internal Links
[Here's a link to the section on Table of Contents Support][TOC]

[TOC]: #Table-of-Contents-Support
4.4 Tables
In Markdown, you can make a table by using vertical bars and dashes to define the cell and header borders:
|Header|Header|Header|Header|
|------|------|------|------|
|Cell  |Cell  |Cell  | Cell |
|Cell  |Cell  |Cell  | Cell |
|Cell  |Cell  |Cell  | Cell |
|Cell  |Cell  |Cell  | Cell |
| Header | Header | Header | Header |
|---|---|---|---|
| Cell | Cell | Cell | Cell |
| Cell | Cell | Cell | Cell |
| Cell | Cell | Cell | Cell |
| Cell | Cell | Cell | Cell |
Making a table this way might be especially useful if you want your document to be legible both rendered and unrendered. However, you don't need to include all of those dashes, vertical bars, and spaces for Markdown to understand that you're making a table. Here's the bare minimum you would need to create the table above:
Header|Header|Header|Header
-|-|-|-
Cell|Cell|Cell|Cell
Cell|Cell|Cell|Cell
Cell|Cell|Cell|Cell
Cell|Cell|Cell|Cell
| Header | Header | Header | Header |
|---|---|---|---|
| Cell | Cell | Cell | Cell |
| Cell | Cell | Cell | Cell |
| Cell | Cell | Cell | Cell |
| Cell | Cell | Cell | Cell |
It's important to note that the second line of dashes and vertical bars is essential. If you have just the line of headers and the second line of dashes and vertical bars, that's enough for Markdown to make a table.
Another important formatting issue has to do with the vertical bars that define the left and right edges of the table. If you include all the vertical bars on the far left and right of the table, like in the first example above, Markdown will ignore them completely. But, if you leave out some and include others, Markdown will interpret any extra vertical bar as an additional cell on the side that the bar appears in the unrendered version of the text. This also means that if you include the far left or right vertical bar in the second line of bars and dashes, you must include all of the otherwise optional vertical bars (like in the first example above).
4.4.1 Cell Justification
If not otherwise specified the text in each header and cell of a table will justify to the left. If, however, you wish to specify either right justification or centering, you may do so like this:
Centered, Right-Justified, and Regular Cells and Headers:
| centered header | regular header | right-justified header | centered header | regular header |
|---|---|---|---|---|
| centered cell | regular cell | right-justified cell | centered cell | regular cell |
| centered cell | regular cell | right-justified cell | centered cell | regular cell |
While it is difficult to see that the headers are differently justified from one another, this is just because the longest line of characters in any column defines the width of the headers and cells in that column.
Note: You cannot make tables directly beneath a line of text. You must put a blank line between the end of a paragraph and the beginning of a table.
4.5 Style and Emphasis
*Italics*
Italics
_Italics_
Italics
**Bold**
Bold
__Bold__
Bold
Note: If you want actual asterisks or underscores to appear in your text, you can use the backslash escape function like this:
\*awesome asterisks\* and \_incredible under scores\_
*awesome asterisks* and _incredible under scores_
4.6 Other Characters
Ampersand & Ampersand
Ampersand & Ampersand
< angle brackets >
< angle brackets >
" quotes "
" quotes "
4.7 Including Code Examples
If you want to signify that a particular section of text is actually an example of code, you can use backquotes to surround the code example. These will switch the font to monospace, which creates a clear visual formatting difference between the text that is meant to be code and the text that isn't.
Code can either in the middle of a paragraph, or as a block. Use a single backquote to start and stop code in the middle of a paragraph. Here's an example:
The word `monospace` will appear in a code-like form.
The word monospace will appear in a code-like form.
Note: If you want to include a literal backquote in your code example you must suround the whole text block in double backquotes like this:
`` Look at this literal backquote ` ``
Look at this literal backquote `
To include a complete code-block inside a Markdown cell, use triple backquotes. Optionally, you can put the name of the language that you are quoting after the starting triple backquotes, like this:
```python
def function(n):
    return n + 1
```
That will format the code-block (sometimes called "fenced code") with syntax coloring. The above code block will be rendered like this:
def function(n):
    return n + 1
The language formatting names that you can currently use after the triple backquote are:
apl           django   go            jinja2      ntriples    q       smalltalk    toml
asterisk      dtd      groovy        julia       octave      r       smarty       turtle
clike         dylan    haml          less        pascal      rpm     smartymixed  vb
clojure       ecl      haskell       livescript  pegjs       rst     solr         vbscript
cobol         eiffel   haxe          lua         perl        ruby    sparql       velocity
coffeescript  erlang   htmlembedded  markdown    php         rust    sql          verilog
commonlisp    fortran  htmlmixed                 pig         sass    stex         xml
css           gas      http          mirc        properties  scheme  tcl          xquery
d             gfm      jade          mllike      puppet      shell   tiddlywiki   yaml
diff          gherkin  javascript    nginx       python      sieve   tiki         z80
4.8 Images
4.8.1 Images from the Internet
Inserting an image from the internet is almost identical to inserting a link. You just also type a ! before the first set of brackets:


Note: Unlike with a link, the words that you type in the first set of brackets do not appear when they are rendered into html by Markdown.
4.8.1.1 Reference-Style Images from the Internet
Just like with links, you can also use a reference-style format when inserting images from the internet. This involves indicating where you want to place a picture, giving that picture an ID tag, and then later defining that ID tag. The process is nearly identical to using the reference-style format to insert a link:
![][giraffe]

[giraffe]:http://upload.wikimedia.org/wikipedia/commons/thumb/b/b7/South_African_Giraffe,_head.jpg/877px-South_African_Giraffe,_head.jpg "Picture of a Giraffe"
4.9 LaTeX Math
Jupyter Notebooks' Markdown cells support LateX for formatting mathematical equations. To tell Markdown to interpret your text as LaTex, surround your input with dollar signs like this:
$z=\dfrac{2x}{3y}$
$z=\dfrac{2x}{3y}$
An equation can be very complex:
$F(k) = \int_{-\infty}^{\infty} f(x) e^{2\pi i k} dx$
$F(k) = \int_{-\infty}^{\infty} f(x) e^{2\pi i k} dx$
If you want your LaTex equations to be indented towards the center of the cell, surround your input with two dollar signs on each side like this:
$$2x+3y=z$$
$$2x+3y=z$$
For a comprehensive guide to the mathematical symbols and notations supported by Jupyter Notebooks' Markdown cells, check out Martin Keefe's helpful reference materials on the subject.
5. Bibliographic Support
Bibliographic Support makes managing references and citations in your Notebook much easier, by automating some of the bibliographic process every person goes through when doing research or writing in an academic context. There are essentially three steps to this process for which your Notebook's Bibliographic support can assist: gathering and organizing sources you intend to use, citing those sources within the text you are writing, and compiling all of the material you referenced in an organized, correctly formatted list, the kind which usually appears at the end of a paper in a section titled "References," "Bibliography," or "Works Cited.
In order to benefit from this functionality, you need to do two things while writing your paper: first, you need to create a Bibtex database of information about your sources and second, you must use the the cite command in your Markdown writing cells to indicate where you want in-text citations to appear.
If you do both these things, the "Generate References" button will be able to do its job by replacing all of your cite commands with validly formatted in-text citations and creating a References section at the end of your document, which will only ever include the works you specifically cited within in your Notebook.
Note: References are generated without a header cell, just a markdown header. This means that if you want a References section to appear in your table of contents, you will have to unrender the References cell, delete the "References" header, make a Header Cell of the appropriate level and title it "References" yourself, and then generate a table of contents using Table of Contents Support. This way, you can also title your References section "Bibliography" or "Works Cited," if you want.
5.1 Creating a Bibtex Database
Bibtex is reference management software for formatting lists of references (from Wikipedia). While your Notebook does not use the Bibtex software, it does use Bibtex formatting for creating references within your Bibliographic database.
In order for the Generate References button to work, you need a bibliographic database for it to search and match up with the sources you've indicated you want to credit using cite commands and citation IDs.
When creating a bibliographic database for your Notebook, you have two options: you can make an external database, which will exist in a separate Notebook from the one you are writing in, or you can make an internal database which will exist in a single cell inside the Notebook in which you are writing. Below are explanations of how to use these database creation strategies, as well as a discussion of the pros and cons for each.
5.1.1 External Bibliographic Databases
To create an external bibliographic database, you will need to create a new Notebook and title it Bibliography in the toplevel folder of your current Jupyter session. As long as you do not also have an internal bibliographic database, when you click the Generate References button your Notebook's Bibliographic Support will search this other Bibliography Notebook for Bibtex entries. Bibtex entries can be in any cell and in any kind of cell in your Bibliography Notebook as long as the cell begins with <!--bibtex and ends with -->. Go to this section for examples of valid BibTex formatting.
Not every cell has to contain BibTex entries for the external bibliographic database to work as intended with your Notebook's bibliographic support. This means you can use the same helpful organization features that you use in other Notebooks, like Automatic Section Numbering and Table of Contents Support, to structure your own little library of references. The best part of this is that any Notebook containing validly formatted cite commands can check your external database and find only the items that you have indicated you want to cite. So you only ever have to make the entry once and your external database can grow large and comprehensive over the course of your accademic writing career.
There are several advantages to using an external database over [an internal one][internal database]. The biggest one, which has already been described, is that you will only ever need to create one and you can organize it into sections by using headers and generating automatic section numbers and a table of contents. These tools will help you to easily find the right citation ID for a given source you want to cite. The other major advantage is that an external database is not visible when viewing the Notebook in which you are citing sources and generating a References list. Bibtex databases are not very attractive or readable and you probably won't want one to show up in your finished document. There are ways to hide internal databases, but it's convenient not to have to worry about that.
5.1.2 Internal Bibliographic Databases
Unlike external bibliographic databases, which are comprised from an entire separate notebook, internal bibliographic databases consist of only one cell within in the Notebook in which you are citing sources and compiling a References list. The single cell, like all of the many BibTex cells that can make up an external database, must begin with <!--bibtex and end with --> in order to be validly formatted and correctly interpreted by your Notebook's Bibliographic Support. It's probably best to keep this cell at the very end or the very beginning of your Notebook so you always know where it is. This is because when you use an intenral bibliographic databse it can only consist of one cell. This means that if you want to cite multiple sources you will need to keep track of the single cell that comprises your entire internal bibliographic database during every step of the research and writing process.
Internal bibliographic databases make more sense when your project is a small one and the list of total sources is short. This is especially convenient if you don't already have a built-up external database. With an internal database you don't have to create and organize a whole separate Notebook, a task that's only useful when you have to keep track of a lot of different material. Additionally, if you want to share your finished Notebook with others in a form that retains its structural validity, you only have to send one Notebook, as oppose to both the project itself and the Notebook that comprises your external bibliographic database. This is especially useful for a group project, where you want to give another reader the ability to edit, not simply read, your References section.
5.1.2.1 Hiding Your Internal Database
Even though they have some advantages, especially for smaller projects, internal databases have on major draw back. They are not very attractive or polished looking and you probably won't want one to appear in your final product. Fortunately, there are two methods for hiding your internal biblioraphic database.
While your Notebook's bibliographic support will be able to interpret correctly formatted BibTex entries in any kind of cell, if you use a Markdown Cell to store your internal bibliographic database, then when you run the cell all of the ugly BibTex formatting will disappear. This is handy, but it also makes the cell very difficult to find, so remember to keep careful track of where your hidden BibTex databse is if you're planning to edit it later. If you want your final product to be viewed stably as HTML, then you can make your internal BibTex database inside a Raw Cell, use the cell toolbar to select "Raw Cell Format", and then select "None" in the toolbar that appears in the corner of your Raw Cell BibTex database. This way, you will still be able to easily find and edit the database when you are working on your Notebook, but others won't be able to see the database when viewing your project in its final form.
5.1.3 Formatting Bibtex Entries
BibTex entries consist of three crucial components: one, the type of source you are citing (a book, article, website, etc.); two, the unique citation ID you wish to remember the source by; and three, the fields of information about that source (author, title of work, date of publication, etc.). Below is an example entry, with each of these three components designated clearly
<!--bibtex

@ENTRY TYPE{CITATION ID,
    FIELD 1 = {source specific information},
    FIELD 2 = {source specific informatio},
    FIEL 3 = {source specific informatio},
    FIELD 4 = {source specific informatio}
}

-->
More comprehensive documentation of what entry types and corresponding sets of required and optional fields BibTex supports can be found in the Wikipedia article on BibTex.
Below is a section of the external bibliographic database for a fake history paper about the fictional island nation of Calico. (None of the entries contain information about real books or articles):
<!--bibtex

@book{wellfarecut,
    title = {Our Greatest Threat: The Rise of Anti-Wellfare Politics in Calico in the 21st Century},
    author = {Jacob, Bernadette},
    year = {2010},
    publisher = {Jupyter University Press}
}

@article{militaryex2,
    title = {Rethinking Calican Military Expansion for the New Century},
    author = {Collier, Brian F.},
    journal = {Modern Politics},
    volume = {60},
    issue = {25},
    pages = {35 - 70},
    year = {2012}
}

@article{militaryex1,
    title = {Conservative Majority Passes Budget to Grow Military},
    author = {Lane, Lois},
    journal = {The Daily Calican},
    month = {October 19th, 2011},
    pages = {15 - 17},
    year = {2011}
}

@article{oildrill,
    title = {Oil Drilling Off the Coast of Jupyter Approved for Early Next Year},
    author = {Marks, Meghan L.},
    journal = {The Python Gazette},
    month = {December 5th, 2012},
    pages = {8 - 9},
    year = {2012}
}

@article{rieseinterview,
    title = {Interview with Up and Coming Freshman Senator, Alec Riese of Python},
    author = {Wilmington, Oliver},
    journal = {The Jupyter Times},
    month = {November 24th, 2012},
    pages = {4 - 7},
    year = {2012}
}

@book{calicoww2:1,
    title = {Calico and WWII: Untold History},
    author = {French, Viola},
    year = {1997},
    publisher = {Calicia City Free Press}
}

@book{calicoww2:2,
    title = {Rebuilding Calico After Japanese Occupation},
    author = {Kepps, Milo },
    year = {2002},
    publisher = {Python Books}
}
-->
5.2 Cite Commands and Citation IDs
When you want to cite a bibliographic entry from a database (either internal or external), you must know the citation ID, sometimes called the "key", for that entry. Citation IDs are strings of letters, numbers, and symbols that you make up, so they can be any word or combination of words you find easy to remember. Once, you've given an entry a citation ID, however, you do need to use that same ID every time you cite that source, so it may behoove you to keep your database organized. This way it will be much easier to locate any given source's entry and its potentially forgotten citation ID.
Once you know the citation ID for a given entry, use the following format to indicate to your Notebook's bibliographic support that you'd like to insert an in-text citation:
[](#cite-CITATION ID)
This format is the cite command. For example, if you wanted to cite Rebuilding Calico After Japanese Occupation listed above, you would use the cite command and the specific citation ID for that source:
[](#cite-calicoww2:2)
Before clicking the "Generate References" button, your unrendered text might look like this:
Rebuilding Calico took many years [](#cite-calicoww2:2).
After clicking the "Generate References" button, your unrendered text might look like this:
Rebuilding Calico took many years <a name="ref-1"/>[(Kepps, 2002)](#cite-calicoww2:2).
and then the text would render as:
Rebuilding Calico took many years (Kepps, 2002).
In addition, a cell would be added at the bottom with the following contents:
References
[^](#ref-1) [^](#ref-2) Kepps, Milo . 2002. Rebuilding Calico After Japanese Occupation.